


Technology Basics – Part 1: Taming the Inbox
Mastering Microsoft Outlook Like a Pro
Welcome to the first installment of the “Technology Basics” series, brought to you by the Law Society’s Representation and Law Reform department. This series aims to offer lawyers practical tips on how to make the most of your technological tools in your daily practice.
In this inaugural article, we delve into Microsoft Outlook, an email management tool that streamlines your workflow and enhances your productivity.
Note: The features discussed in this article are based on the Microsoft Outlook 2016 desktop application for Windows. These features may appear differently in Microsoft Outlook 2016 for macOS, the web version of Microsoft Outlook 2016, and subsequent versions of Microsoft Outlook for Mac and Windows.

Introduction
Lawyers rely heavily on email as their main mode of communication with clients and colleagues. With numerous cases and matters to handle simultaneously, a flooded inbox is practically a rite of passage. However, mastering the art of email management can transform this digital deluge into a seamless workflow, ensuring you and your law practice operate like well-oiled machines.
Here is an overview of what this article covers:
- Creating Folders – File your emails to find them easily
- Creating Rules – Automatically file emails into designated folders
- Delay Delivery – Schedule an email to be sent at a later time
- Creating Contact Groups – Use groups to avoid missing out recipients
1. Creating Folders
Organising your inbox by creating folders based on file reference numbers or subject matters is an effective way to manage your emails. By decluttering your inbox into dedicated folders for each matter and standardising the naming conventions of your folders, you can easily file, search, identify, and prioritise emails.
If you prefer a simpler approach, consider categorising your emails into generic folders such as:
- “Client/Case Related”: To file emails on active matters that require follow-up.
- “Completed”: To file emails on cases that have concluded and do not require further follow-up.
- “Staff matters”: To file emails on non-work related emails pertaining to the administration of your law practice and internal communications.
- “Law Society publications”: To file the Law Society’s e-blasts and weekly e-newsletters (Jus News and Weekly Pulse).
To create a folder:
- Right-click “Inbox” on the sidebar and click “New Folder”.

- Name the folder. In this case, we have used the title “Client/Case Related”.
- Drag and drop the relevant emails into the respective folders to add them to the folder.
- Rearrange the folders for quick access, if needed, by clicking on the folder and dragging and dropping it in the order you prefer.
Pro Tip: If you require additional organisation within the folders, click “Categorize” to color-code your emails. You can find this button in the “Home” ribbon.

In order to change the name of the categories, click “All Categories…” A pop-up should appear, as shown below. Here, you can change the names of the categories, delete categories, and create new categories. Once done, click “OK”.

Once you have renamed the categories, you may colour-code your emails by clicking “Categorize” and the applicable category tag.
Should you wish to locate an email, look for the “Categorized” button that appears in the “Home” ribbon at the top. You may then select the color code associated with the email in order to see all relevant emails under the category. This will narrow your search for a particular email.

2. Creating Rules
In addition to manually filing emails into designated folders, you can set up rules in Microsoft Outlook to automatically sort incoming emails into the appropriate folders as and when you receive them. For example, emails from the Law Society on the latest Singapore Law Gazette publication can be automatically filed into a folder titled “The Singapore Law Gazette”. You may then access the latest issue of the Singapore Law Gazette at a later time for a leisurely read. To set up rules:
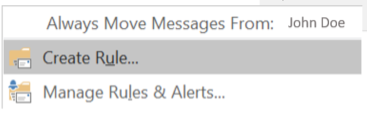
- Right-click an email you want Microsoft Outlook to sort automatically. Alternatively, click the “Rules” button in the “Home” ribbon at the top.

- To move all emails from a particular sender or client to a specific folder, click “Always Move Messages From: <Sender’s name>”. Click “Create Rule” to customise your rule.
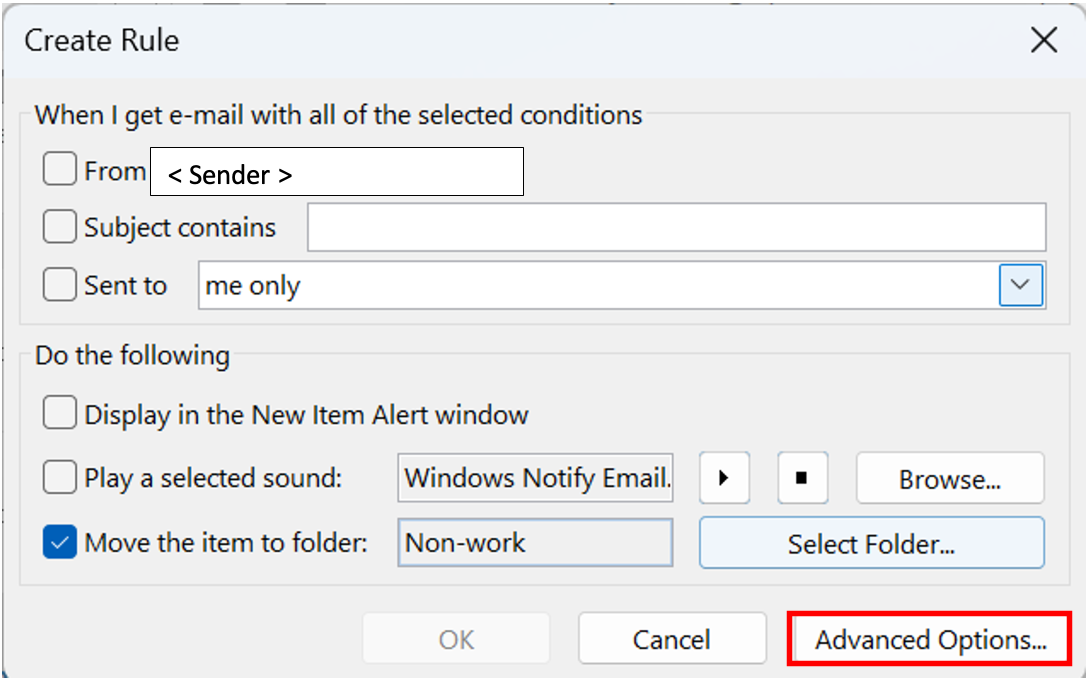
- A new window, as shown below, will appear. Check the conditions on the sender, subject, and recipients that apply to your intended rule. To add exceptions to your rule, click the “Advanced Options” button and customise accordingly. Once done, click “OK”. Microsoft Outlook will then file your emails as and when you receive them in real time, if the rules you have specified are met.
To delete or deactivate any rules:
- Complete Step 1 above.
- In relation to Step 2, click “Manage Rules and Alerts” instead to view all your active rules.
- To deactivate a rule, uncheck the box.
- To delete a rule, select the rule and click the “Delete” button. Click “Apply”, then “OK”.
Pro Tip: Use the Rules Wizard to customise your rules. The example below shows one usage of Rules Wizard.
In order to get to the Rules Wizard, select the “File” tab in the ribbon at the top and click “Manage Rules & Alerts”.

Under the “E-mail Rules” tab, click “New Rule…”.

On this page, you will be able to choose from a variety of templates comprising different rules. In this example, we will demonstate how to create a rule that flags messages from someone for your follow-up (“Flag messages from someone for follow-up”). Select your preferred template and click “Next >”.
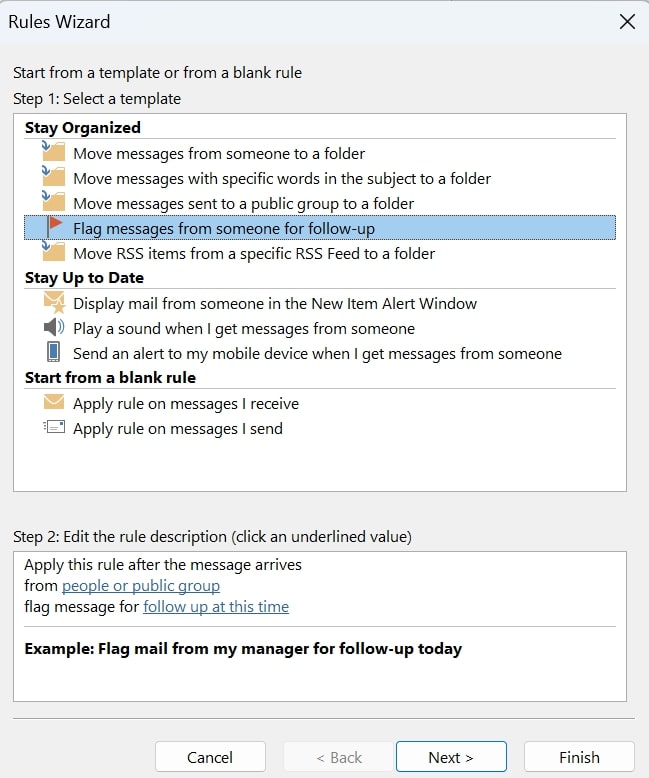
On this page, you will be able to choose your first condition. You may select one or more conditions to apply to your rule. Once done, move on to the next page.

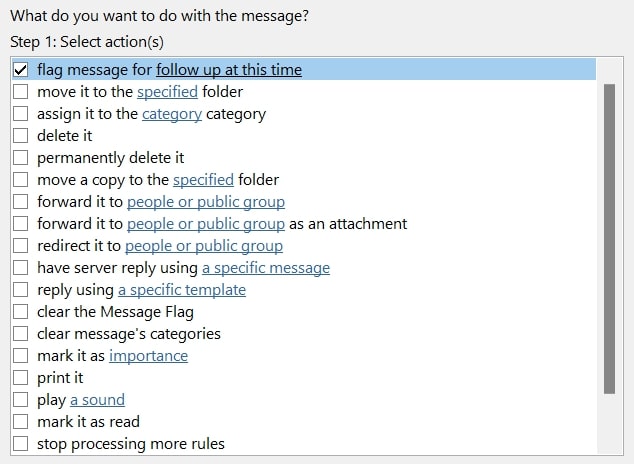
On this page, you will be able to choose the actions that will be taken when the condition for this rule is met. Again, you may select one or more conditions. Go to the next page once you have selected your applicable action(s).
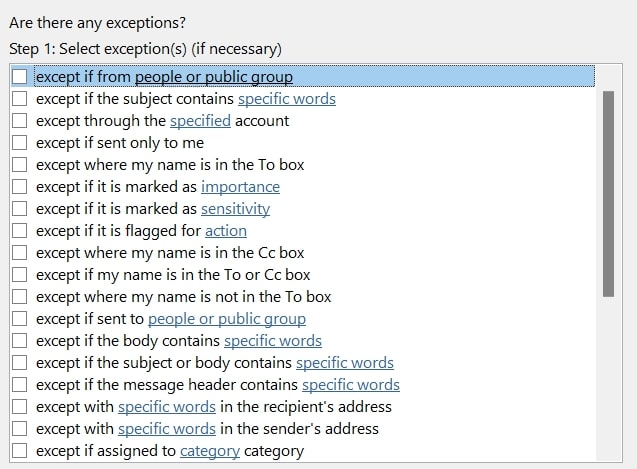
On this page, you will be able to choose any exception(s) that you wish to add to the rule. This is optional. Once done, move on to the next page.
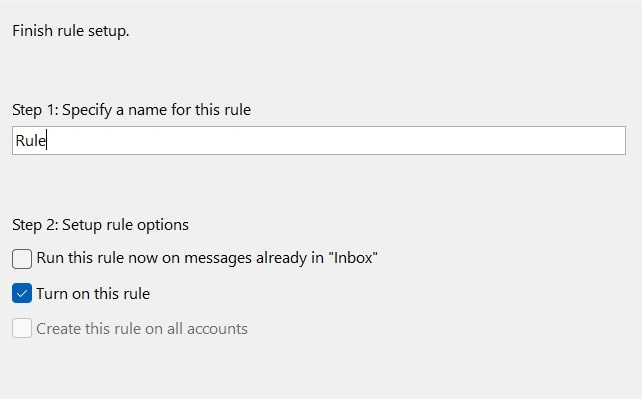
On this final page, name your rule and choose your setup rule options. Once done, click “Finish” at the bottom and your rule has been created.
3. Delay Delivery
Many lawyers often work beyond regular business hours, including late into the night. However, sending non-urgent emails to clients or colleagues during these times may not be well-received, as it could imply an expectation for recipients to respond outside of regular working hours. By scheduling the exact date and time for sending emails, these concerns can be alleviated, allowing for better control over communications.
To delay the delivery of your email:
- Draft the email.
- Locate the “Options” tab. If you are replying to an email and are unable to see the “Options” tab, click the “Pop out” button at the top-left – you should be able to see the “Options” tab. Click “Delay Delivery”.

- In the “Do not deliver before” field, specify the date and time you want the email to be sent, and click “Close.” Finally, click “Send.”
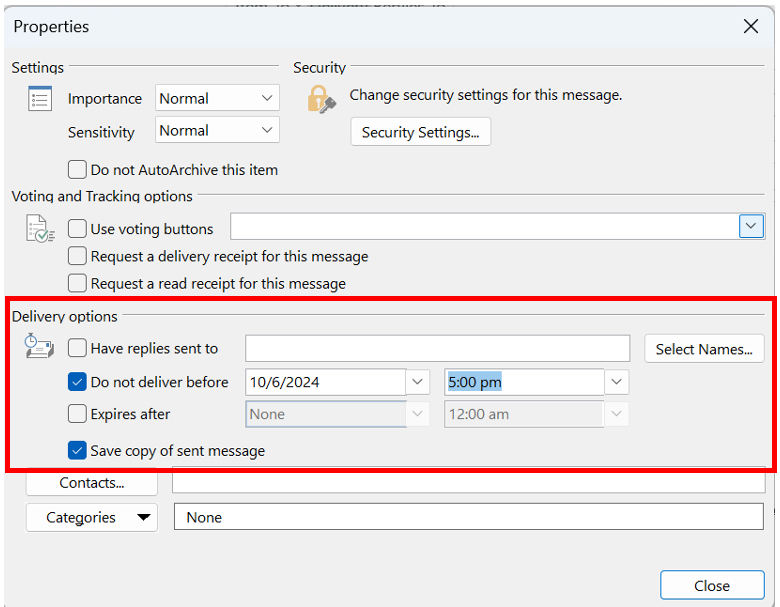
The email will be sent at specified time. However, ensure that your Microsoft Outlook application is open and that you are connected to the internet at the specified scheduled time for the email to be sent successfully.
Pro Tip: You can re-schedule the delayed timing and change the contents of your email prior to the specified “Do not deliver before” timing. Simply go to “Outbox” and you should be able to find your delayed email to be delivered. Double-click the email and change the contents as you wish. Follow steps 2-3 above to set the new “Do not deliver before” timing and click “Close”. Once done, click “Send” once again and the changes would apply.
4. Creating Contact Groups
If you find yourself frequently emailing the same group of colleagues on a matter, using contact groups can ensure that all intended recipients are included without inadvertently missing anyone. For example, if you need to email all your paralegals and secretaries, you may create a contact group with the name “Support Staff” and all members of your firm’s support staff will receive the email. This saves the hassle of typing each email address individually.
To create a contact group,
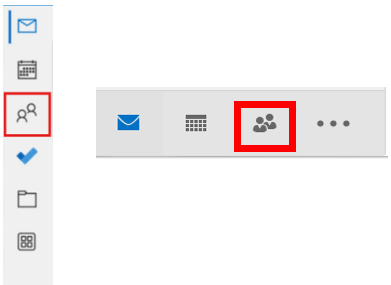
- Click the “Contacts” symbol on the left sidebar.
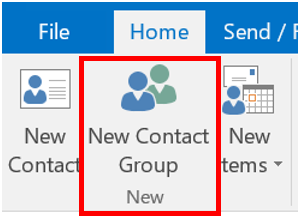
- Click the “New Contact Group” button at the top of the ribbon.
- Add the members that you want in your mailing group. Choose from your Microsoft Outlook Contacts, Address Book, or use a new email contact as shown below. Insert a name for the group.
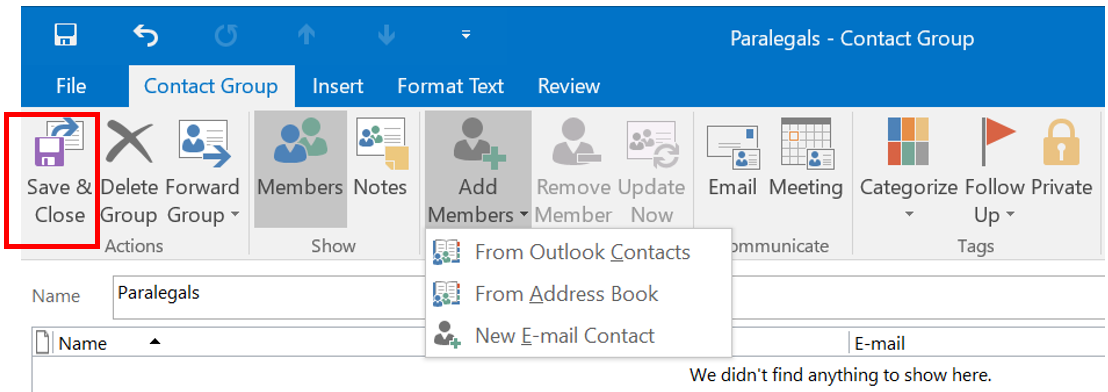
- Click “Save & Close”. When you need to email the same group in the future, type the name of this contact group in the “To:” or “Cc:” field and it will include everyone within the group as recipients.
Pro Tip: If you have previously sent an email to a long list of recipients and do not wish to type out every email address manually when adding them to a contact group, you can make use of copy-paste functions. Below is a short guide:
- Locate the email that you had previously.
- Click right next to a semi-colon (;) and use the keyboard shortcut Ctrl+A or triple click a semi-colon.
- Right click after the whole row is highlighted and click “Copy”.
- Follow steps 1-3 above and click “From Outlook Contacts”.
- At the bottom of the pop-up next to “Members”, right click within the box and select paste. Alternatively, use the keyboard shortcut Ctrl+V.
- Click “OK” and follow Step 4 above.
Conclusion
If you enjoyed this article, stay tuned for more from the “Technology Basics” series, brought to you by the Law Society of Singapore’s Representation and Law Reform department.
For feedback on this article and/or suggestions for topics this series can cover, please email us at [email protected].
The authors are grateful to Mr Astin Tay Wee Loon’s contributions to this article during his internship with the Law Society.